Showing posts with label Do It Myself. Show all posts

Sunday, November 27, 2011

Glass Blowing at J & C Glass Studio

Rachel had mentioned a while ago that she was interested in glass blowing and when we found a Groupon for an "experience" at a local studio it seemed like a great idea.

The Groupon was good for either pumpkin or ornament making day workshops or just for $50 worth of merchandise -- which, of course, wouldn't be nearly as fun -- at J and C Glass Studio. From the Groupon we both thought that the studio was in Little Italy, as it turns out the gallery is in Little Italy but the actual studio is in Cleveland's Glenville neighborhood (in the same building as Fourth Wall Productions had a short-lived theatre space)

We decided to book the Ornament Making class and upon arriving at the studio this afternoon there were two things that immediately struck us: First the hospitality of the studio staff and second the intense heat. This was certainly somewhere to be on a cold winter day. The class consisted of two instructors and 8 students, with each student guided through the process of making two ornaments.

First, we heated our blowpipes, and once hot (with my body about a yard from the furnace it felt like my wrist was on fire) we dipped in molten glass to pick up a glob. From this point on, spinning the pipe became important to keep the liquid glass on the blowpipe from drooping.

Rolling in the color of your choice (I did red and green, Rachel did green and blue) you then returned to the furnace to melt the color in. Coming out of the furnace the glass is rolled out into a oblong pellet about the size of a roll of quarters.


The first step requires an amazing amount of human-provided air pressure to form an air bubble in the ornament while rolling the blow stick back and forth across the rails. A trip back to the furnace to soften the glass a bit and some light air pressure with a bit of forming assistance from the J&C staff brings the ornament to its final shape.

The ornament, now a definite object, is cut free from the blow stick and a final blob of glass added and formed over to form a hook and the ornament is done -- the only step remaining is to be annealed which requires an overnight stay in their ovens.

Rachel and I will return soon to pick up our ornaments -- but it was quite the fun (if a bit sweaty) experience.

J and C also had a sampling of glass products for sale at very reasonable prices -- Rachel picked up a paperweight for $5 and I found a glass flower (to give purpose to a vase I picked up on one of my last visits to the Kemper Museum of Contemporary Art in Kansas City) for only $10. Still, there were a collection of glass vessels with faces whose expressions were just too cute. I'm particularly enamored by one green one with a beret and bow tie -- but it was not priced, and I'm a little hesitant to email the artist for price (under the heading of "if you have to ask...")

Lincoln

Wednesday, March 16, 2011

With Photos: A tech guy plays with lumber and technology

(I had planned on attending CityMusic Cleveland's concert this evening but with an all-day raging headache* and the time I left the office, I couldn't get myself excited enough about hearing another violin concerto to deal with the parking at the venue... I present this post, which was already mostly written, in its stead.)

I'm not sure how many of you remember Part I (A Technology Guy Plays With Lumber) from all the way back in October, if you don't go ahead and take a moment to go back and look at that post, I'll wait for you.

Back so soon? Since that post I've finished out the table by adding a bottom shelf (currently serving as a bookshelf) and both table lights and accent lights with Crestron dimmers so, like every other light in my house, they can be included in "Scenes" that are activated by one button control multiple lights throughout the house. Another benefit is that they can be controlled from anywhere in the world.

(Just between you and me, I think it's kind of amusing that $19 Ikea table lights -- chosen after searching about 10 other places because I liked the clean lines and relatively small size -- are plugged into dimmers that retail for well over $300 a piece)

Here's the finished result:
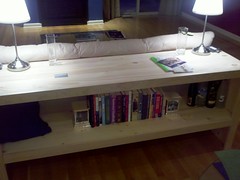
Sofa Table

And the dimmers (you can also see an edge of the rope light used for the accent lighting)... these are under the top shelf:
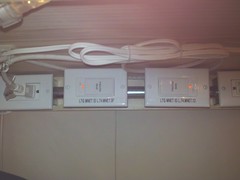
Dimmers for the Sofa Table

So that's it for the update... Now for the new stuff... (And the first time anyone has seen the 3rd floor in my home since I moved in)

I've been planning for a while that once my income tax refund showed up I was going to do some basic decoration for my master bedroom. It showed up I did** the two things I've been putting off:

The Headboard... I've been sleeping against drywall for a while and I thought this made my bedrooom look even more unfinished than it actually is. About $80 in pine, some 2x4s and nails I had laying around, add some LED lighting left over from another project, an afternoon of releiving fustrations with a hammer and finishing nails and voilla:
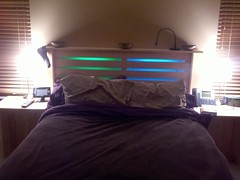
My Headboard With LED Ligthing
The top piece is just 6' pine, uncut. My original thought was to cut it to be flush with the sides of the headboard, but when I threw it up to measure for length, I thought the overhang gave some visual interest and I figured I'd try it that way for a while. Don't ask why there's a random hat hanging from one side.

The three bowls are my spare change. They were on the table that the TV was on before it got wallmounted and I couldn't figure out where to put them for the time being... so there they are. It's funny, the part that actually took the longest to cut and fit -- the 3/4" spacers in the gaps left, center, and right, are -- barely visible in the photo.

Looking at it I'd like to put something like sandblasted decorative glass in the gaps to add some visual interest. But I don't know where I would procure such an object, let alone inexpensively. Plus: I think it's time I buy new sheets and pillows before I buy glass.

For poof that it is indeed my bedroom, you'll notice the two pine nightstands I built quite a while ago (and I think I want to add shelves and/or drawers) with a Crestron TPS-6X touch panel for control of nearly everything in my home -- that will be another post, eventually -- on the left and a Cisco 7961G-GE IP Phone connected to my home phone system.

The HDTV: As a tech guy, specifically and audio/video automation tech guy, the 15 year old CRT in my master bedroom was starting to become a bit embarrassing. Although I had planned on a 32 or 37", based in picture quality and price I would up with a 40" Sharp Aquos LCD...and then decided to mount it on the wall.

Here's the finished result; for the wall under the LCD my plan is to build something along the same lines as the sofa table, though this time most likely with doors or drawers. That, though, will likely be on hold at least until I figure out what I'm doing with my car:
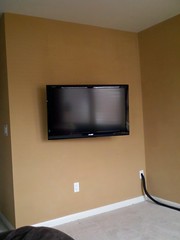
The Finished Product

That black bundle of TechFlex goes off to a wall plate with all of the cable connections on it (if you're interested, see this photo). In an ideal world I would have just moved the wall plates, but redoing my garage was enough drywalling for a year so I decided to take the quicker way out.

The wall the TV is mounted on backs up to the walk-in closet, so all of the support equipment to make the magic happen is mounted behind the clothes rods there:
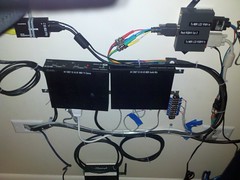
Support Equipment In The Closet Behind the TV
(Click for the larger version which includes a description of everything in the photo, there's still a little cleanup needed here)

Going back in time, this is what it looked like after I had lag bolted the mount into studs and leveled everything, but before the TV was mounted or the wiring was installed... Note the plethora of blue tape marking studs, the top and bottom of the LCD, the top of the imaginary piece of furniture, ideal center line (not possible to hit due to stud location) and all of those other goodies:
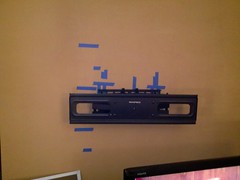
The Mount Is Up

Feel free to check out the complete set of photos for some more progress shots of the mount. Unfortunately, I didn't think to take progress shots while building the headboard, but the two projects had a lot in common with respect to measuring 10 times and plenty of blue tape.

Lincoln

*- I'm pretty sure my body really doesn't like this whole 30-and-blizzard/50-and-sunny extreme. This is the first time I can remember and Advil-resistant headache that literally woke me up at 3:45 AM and hasn't gone away.
** - Before my car issues developed; had my car issues developed sooner my income tax refund probably would have turned into "Lincoln's Car Down Payment" and these would have gone undone for another year.

Monday, December 20, 2010

In Photos: A Technology Guy Plays With Drywall (& Technology)

I'm on my way to Southern California tomorrow for a quick-ish holiday family visit... before I leave though, I can proudly check a major item off of my to-do list.
But first...

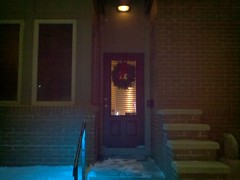
Front Door at Christmas

Since I'm not sure how many posts will come between now and Christmas, before I forget let me wish everyone, not otherwise offended, a Merry Christmas... This is my front door with a live wreath from St. Ignace, MI courtesy of my grandparents and newly-installed handrail lighting in "blue-green" mode (it's capable of about 250 colors)


When I moved in, I had a perfectly nice house, but working in technology -- specifically audio visual integration/automation technology, I had some "upgrades" to install throughout the home -- security, whole house audio/video, lighting, and automation. Living in a vertical townhome, the easiest way to do this was to drop the ceiling in the garage and cut quite a few holes in walls on the upper levels.

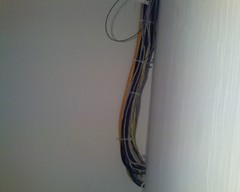
It seems I've misplaced all of the real early photos -- the ones showing various bundles with somewhere around 150 wires but here are two early in-progress photos:

Click for largerBundle of  A/V cables

My boss -- someone with many miles of drywall under his belt from his own home improvement project -- was nice enough to help patch and blend the drywall in the living spaces of my home but left the garage as a learning lesson for me. I was nervous. I've seen some bad drywall in my time. The actual drywall went up during last spring, budding and taping was a process that I procrastinated on for far too long.

I'm hosting an event (might be a party, might not, the details are still a bit too be determined) in mid-January and between that inspiration and having 3 weeks of vacation to use before the year is up to motivate me to finish things. I have to say that I'm generally quite satisfied.

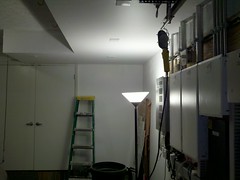
Garage Finished - Long Shot West

All of the drywall on the underside of the sofit was installed and finished by yours truly... I wish the areas around the conduit were a bit cleaner, but all-in-all I'm quite happy with the results. You really can't see any of the seams!

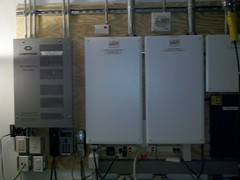
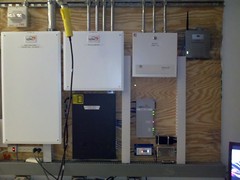
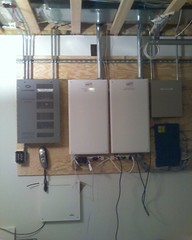
Since drywall doesn't really photograph that well -- it is ultimately flat and white -- I figured I'd throw in some photos of the reason I dropped the ceiling:

Garage Equipment East HalfGarage Equipment West Half

Go ahead and click the pic for a larger version and a description of what everything is.

Later this year or early next year, I'll put together a post on the AV Equipment Room

Lincoln

Monday, October 25, 2010

A technology guy plays with lumber... (with photos)

When I got my new phone from work a couple weeks ago, one of the first things I did was test the speaker phone to see if it would be usable. I called my boss from my living room. "How does it sound?" I asked "Like you have me on speakerphone in an under-furnished townhouse" was his answer.

Between having eyes that are bigger on style (I prefer clean lines and minimal ornamentation) than my wallet is on cash, it's true -- to take the apt words of my boss "under-furnished" -- Rather than buying pieces I don't love for the sake of owning furniture* many traditional pieces have been temporarily forgone**

For example, my bowling alley of a living room has been crying for something to delineate "living" from "dining" more clearly than the naked back of a sofa. The one piece that I've seen that earned a "eh, I could probably make that work" reaction shocked me away with a $1,900 price tag. Likewise, I was enamored by one of the set pieces from The Cleveland Play House's Around the World in 80 Days, but realized--if by some long shot I could acquire it--its proportions probably wouldn't work.

I've had occasional delusions of building my own furniture (and I do own a respectable, if far from complete collection of tools) but I also realize my own limitations: Mechanical precision is something I appreciate but is not a strong suit. Any design would have to be relatively simple, both to satisfy my desire for clean lines and to address the precision aspect.

The right combinations of light bulbs flicked on while my mom was visiting... a spontaneous visit to the Home Depot lumber department and about $80 in materials later I have "Phase 1" of my sofa table.

Yes, it's pine -- possibly the cheapest solid wood; similar size oak and poplar boards, for example sell for more per lineal foot than pine does for a full 6' board -- but the pieces my mom and I pulled look pretty darn nice, if I do say so myself... and it's real wood, not particle board, press board, laminate, or plywood.

My original thought was that I wanted something "piano black" (e.g. black high-gloss lacquer) but the natural wood is growing on me. Recognizing my limitations all of the joints are 90 degree butt joins rather than the more traditional mitred edges. It looks a little cleaner, but I can guarantee that I'd flub the measurements and waste perfectly good wood... Not having to worry about angles makes the cutting much easier.


Phase II will add a shelf underneath and will turn the "sofa table" into a combination "sofa table/sideboard" and add interface modules for my house lighting system so that the table lamps (to be acquired) can be automatically dimmed with the rest of the lights in my house.

With my mom's extra set of hands (which came in quite handy while navigating a 6' long by 18" wide piece of wood up the stairs without damaging anything as well as while nailing the trim to the top and legs) it took 6 pieces of lumber, 6 cuts and maybe 90 minutes to build. And left a sense of tangible satisfaction when I was finished.

(The geeky touches that prove that it actually is my living room: The Cisco VOIP phone, my violin, and in the background the posters enticing you to visit destinations served by long defunct airlines)

Lincoln
* - The idea of spending (wasting) money on something less than ideal for a nicety such as furniture is repugnant to my "don't do anything half way" motivations...especially if I plan to replace it.
**- It really wasn't that long ago that my nightstand (read: the object upon which my alarm clock sits) was upgraded from "cardboard moving boxes" to "scrap board held up by hastily-assembled 2x4 scraps left over from an earlier project"